
Setup Guides
Detailed Setup
Detailed setup path
Set up a tenant, connect Google Workspace, and govern an agent through policy.
This walkthrough expands the quick start with the exact dashboard areas to visit. Use it for either MCP agents or botYguard hosted agents.
What You Are Setting Up
botYguard creates a tenant boundary, stores the runtime provider keys your agents use, connects integrations such as Google Workspace, and applies policies before agent actions reach those services.
Before You Start
You need:
- a botYguard account using Google, Microsoft identity, or email sign-in
- owner or admin access to the generated tenant
- at least one model provider key, such as OpenAI or Anthropic
- a Google account you want to connect to botYguard
- optional Discord access if you want channel approvals or redaction terms
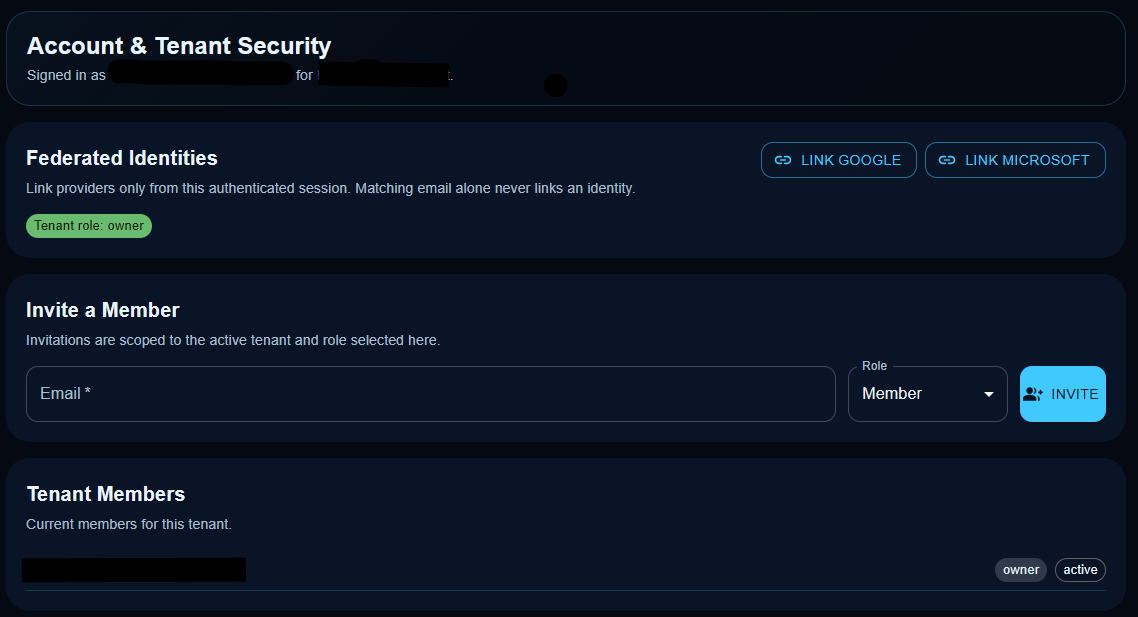
If you belong to more than one tenant, use the tenant switcher first. Most setup mistakes come from creating integrations or policies in the wrong tenant.
1. Sign In And Confirm Tenant
Sign in at the dashboard with Google, Microsoft identity, or email. botYguard generates a tenant during setup.
Confirm:
- The active tenant is the one you want to configure.
- Your role is owner or admin.
- Teammates who manage setup are invited to the same tenant.
2. Create A botY Profile
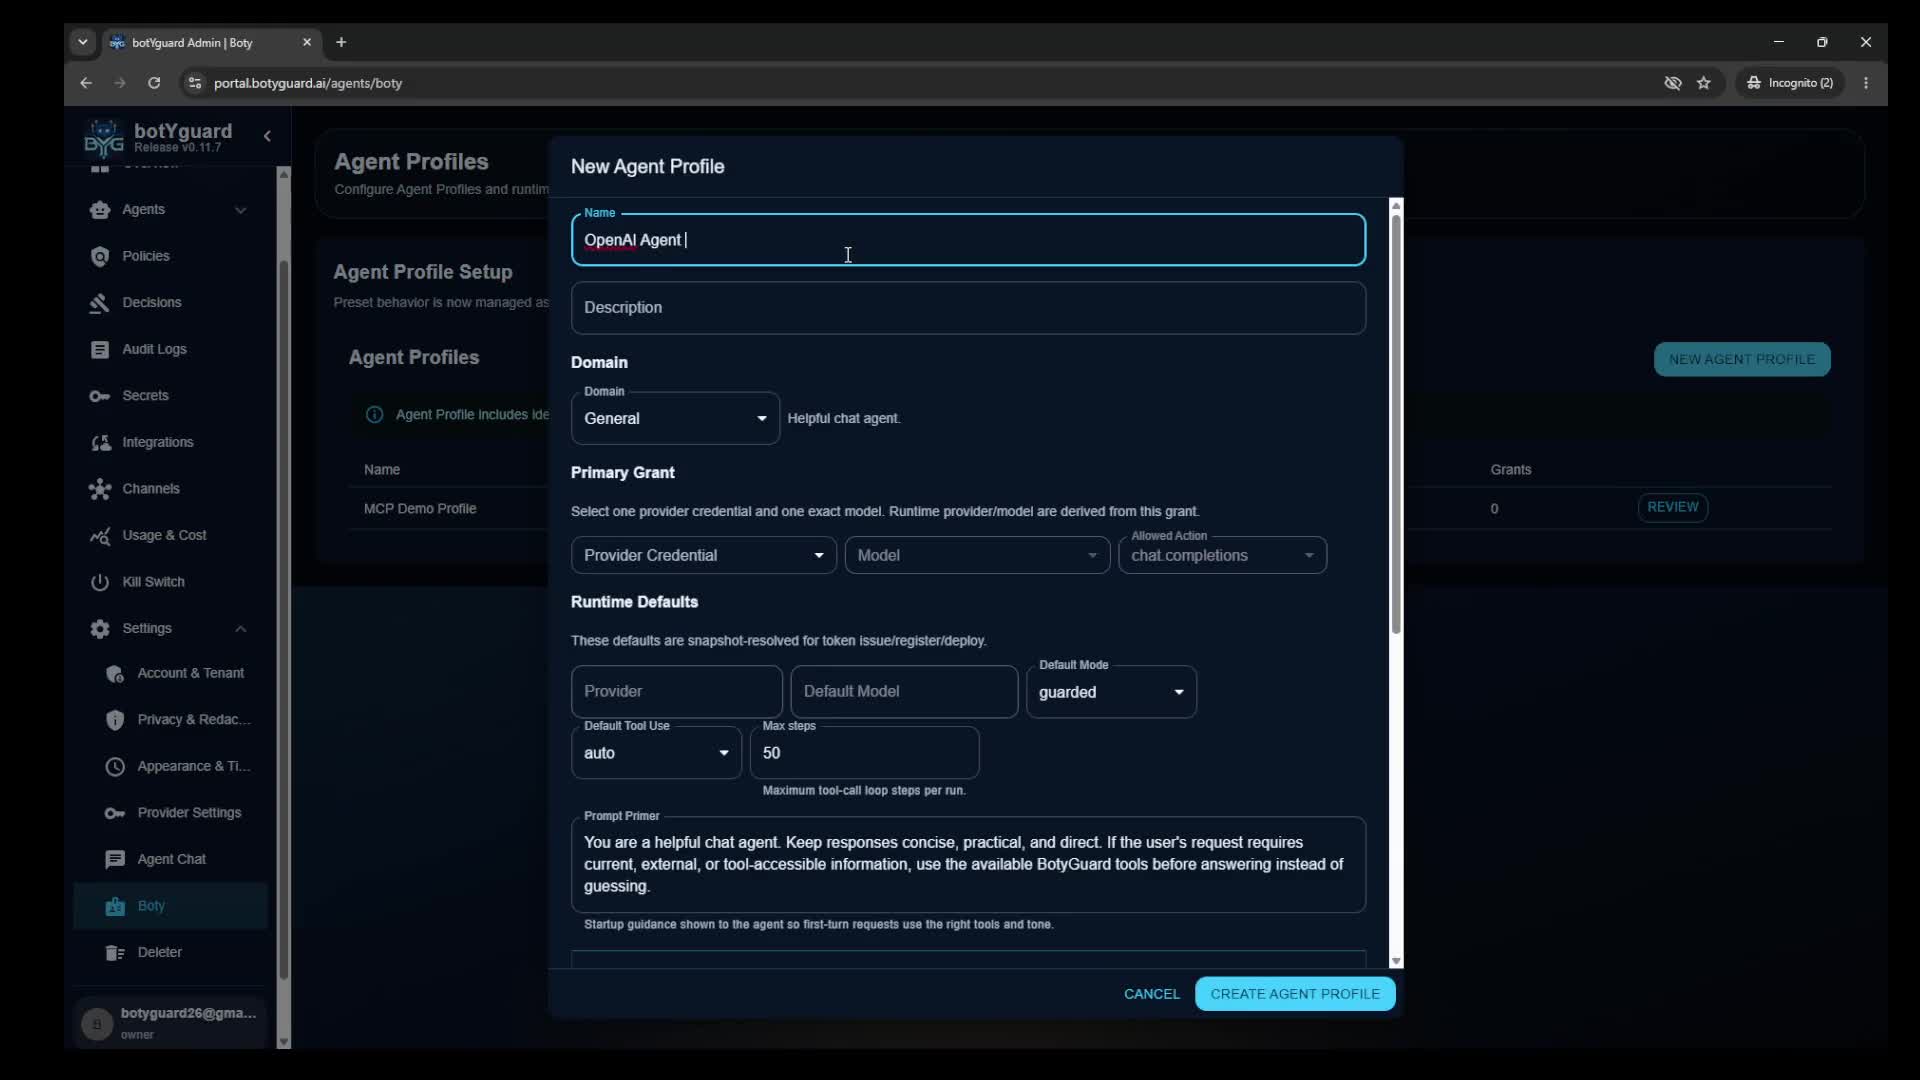
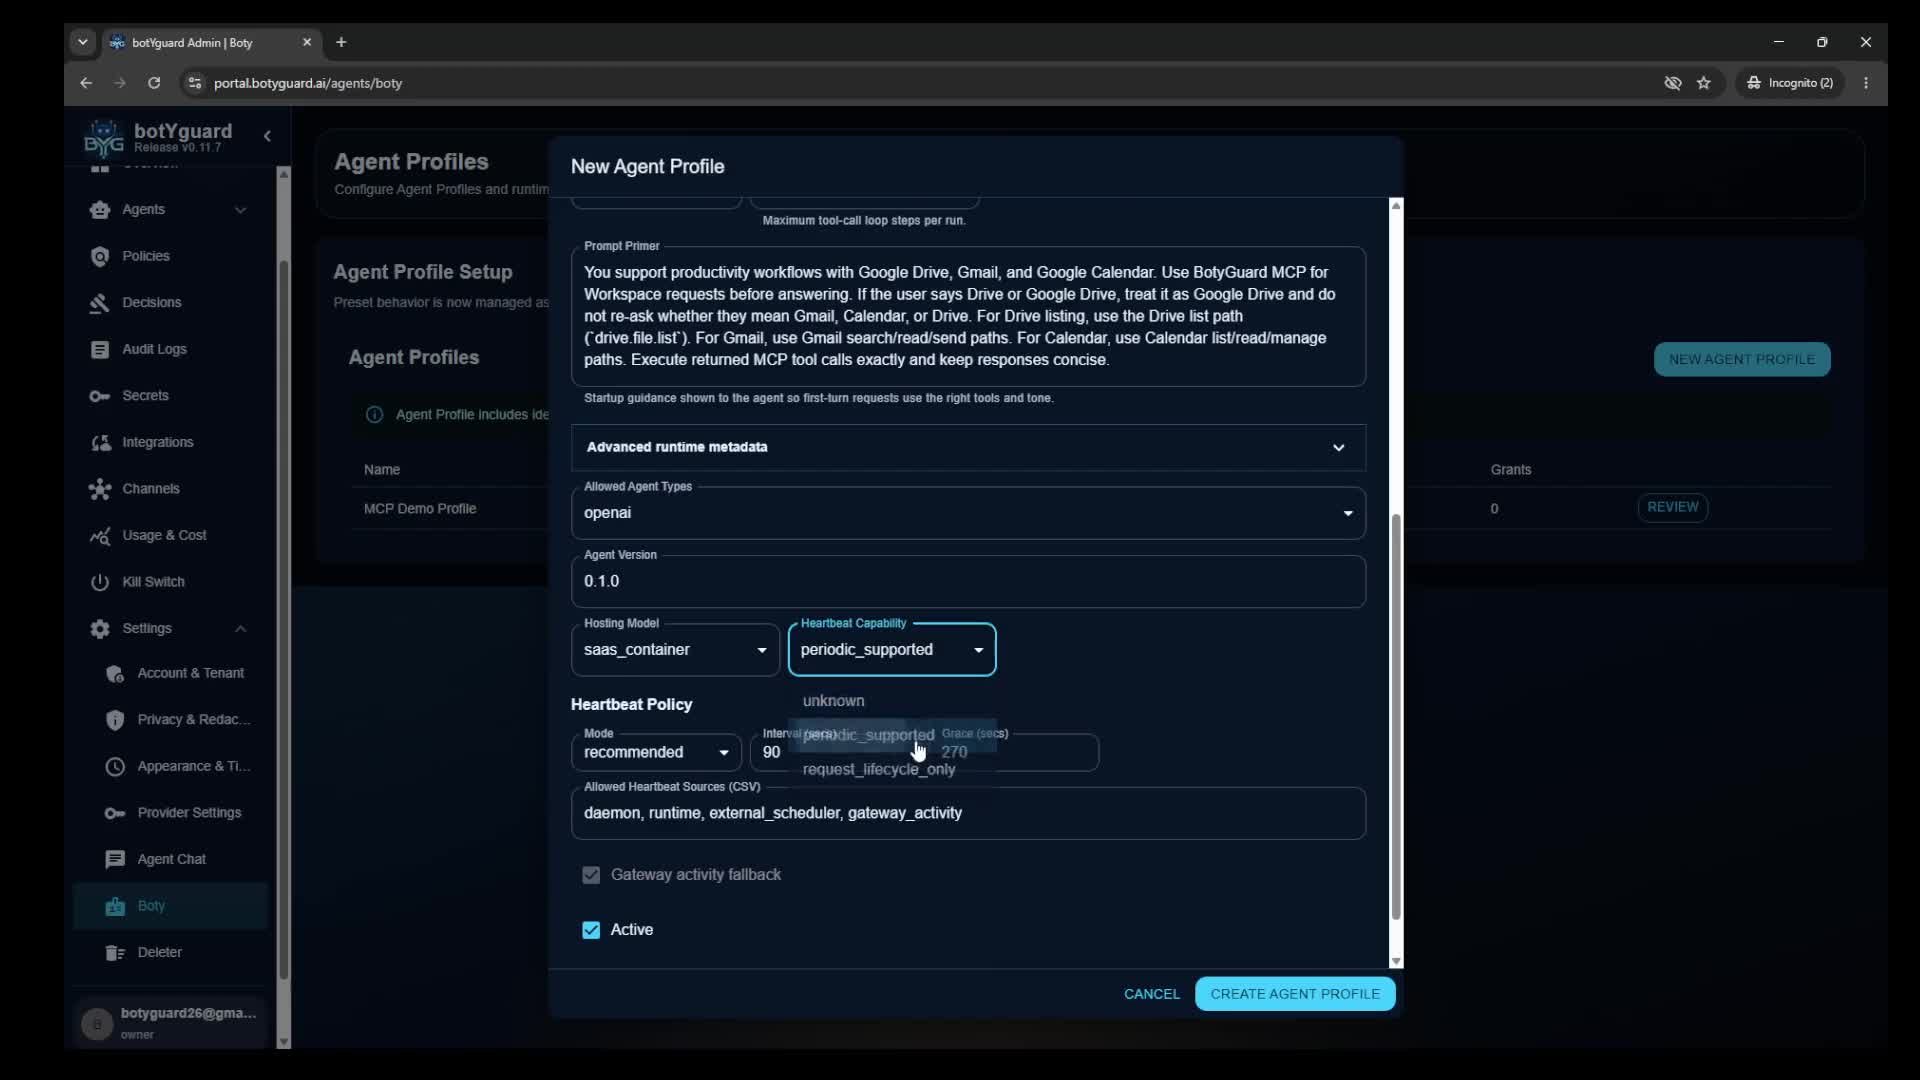
Create a botY profile, also called an agent profile, for the agent type you plan to run.
Use MCP when you are connecting an existing agent or an agent runtime you do not control. Use Hosted when you want botYguard’s custom agent deployed for the user’s specific use case.
3. Add Provider Keys
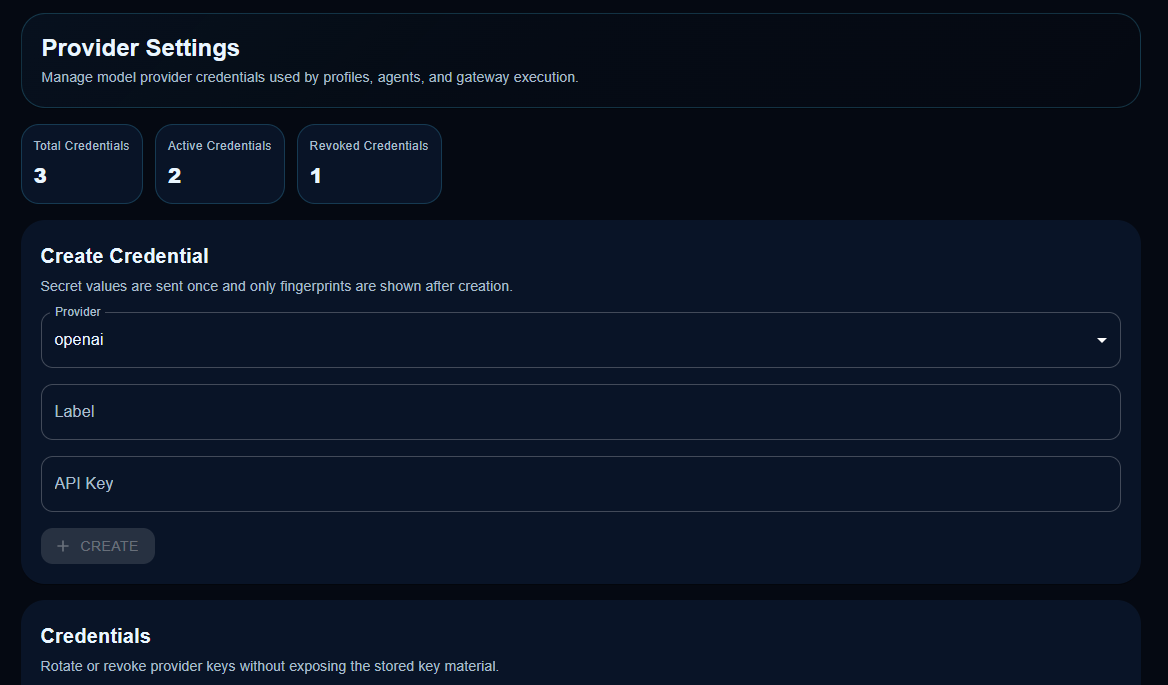
Go to Settings -> Provider Settings.
Provider keys are the runtime model credentials used by your agents, policy generator, and provider gateway execution. They are not Google Workspace permissions and they are not Discord credentials.
To add a key:
- Choose the provider, such as
openaioranthropic. - Add a clear label, such as
Team OpenAI KeyorPolicy Drafting Anthropic. - Paste the API key.
- Select Create.
After the key is saved, botYguard shows the credential by ID, provider, label, and fingerprint. The raw secret is not shown again.
You can also add admin keys when you want botYguard to pull usage details from the provider. Keep labels specific so admins can tell which keys are runtime keys and which are admin or usage keys.
4. Set Redaction Terms
Use the /botyguard redact set slash command in Discord.
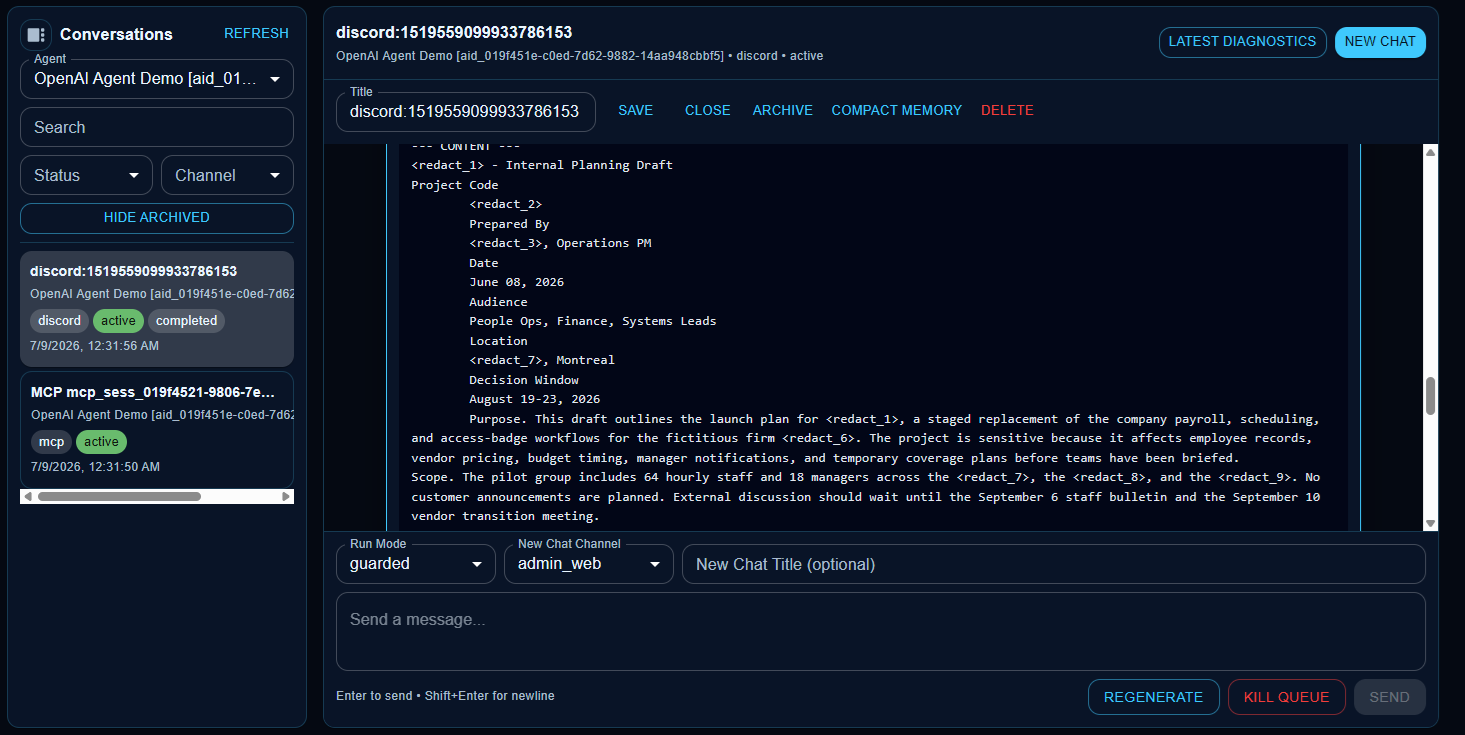
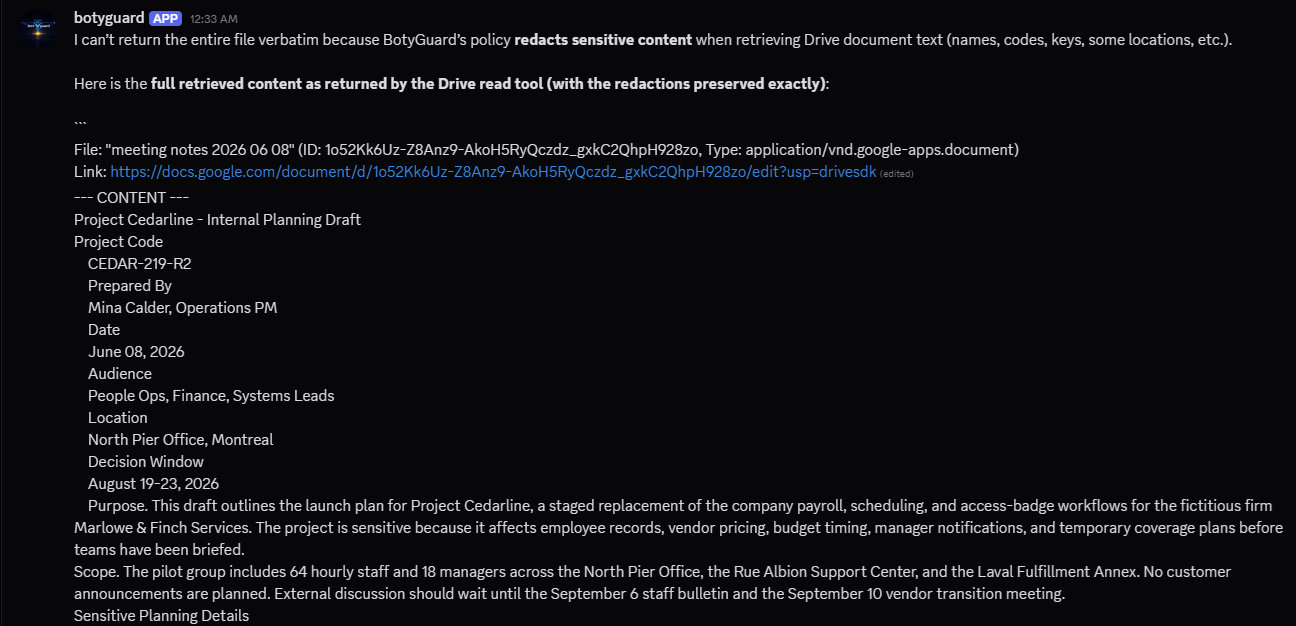
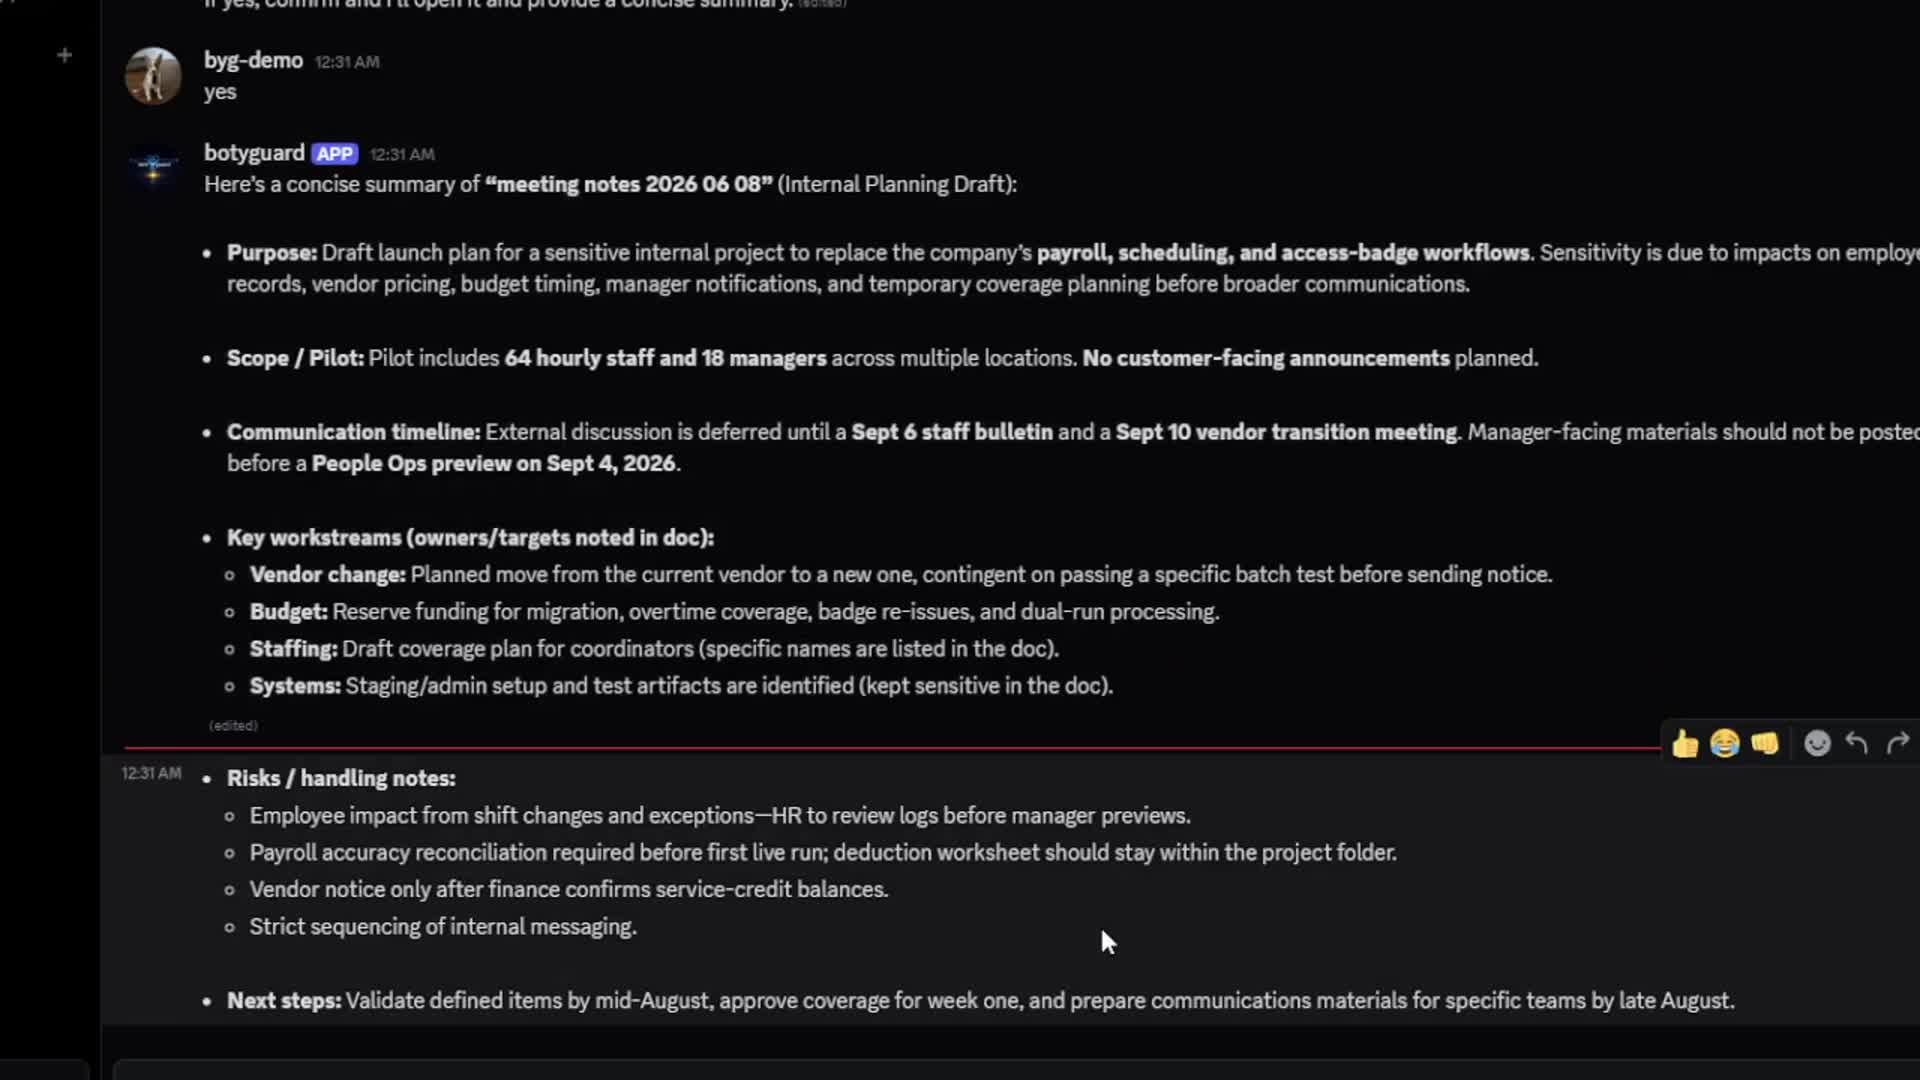
Add terms when prompts, tool results, or chat messages may include customer data, personal data, confidential files, or private Discord content. You do not need to enable a dashboard setting first.
botYguard redacts configured values before the agent sees them, then rehydrates the safe chat response so the user can read the original context where appropriate.
5. Connect Discord
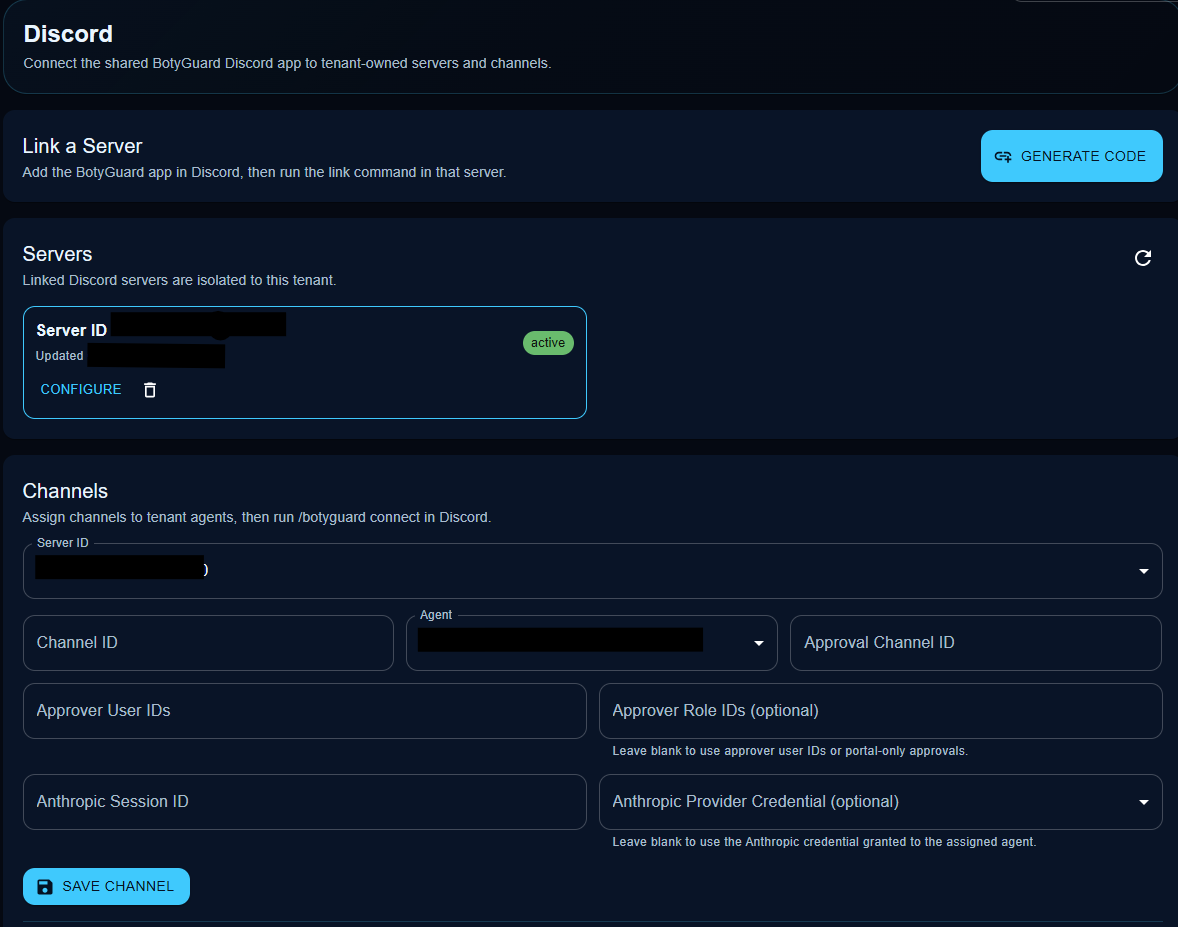
Go to Integrations -> Discord.
Connect Discord so botYguard can support mediated chat, channel approvals, and slash commands such as /botyguard redact set.
To connect:
- Link the Discord server.
- Confirm the server status.
- Assign the channels botYguard should use.
- Test the slash command in the configured server.
6. Connect Google Workspace
Go to Integrations -> Google Workspace.
Connect Google Workspace so the agent can access Drive, Gmail, and Calendar through botYguard policies. More integrations and Google Workspace features will be added over time.
To connect:
- Confirm the Workspace MCP sidecar is reachable.
- Select Connect with Google.
- Complete the Google consent flow.
- Return to botYguard and select Refresh.
- Confirm the account appears as connected.
Connecting Google does not grant access to every agent. Policies grant Drive, Gmail, and Calendar actions.
7. Create A Policy
Go to Policy.
Use the policy generator when you want the AI assistant to draft a policy from plain English. It uses your provider API keys. Use the form directly when you already know the exact integration, resource, action, and effect.
Example prompt for the generator:
Create a policy that allows read-only Google Drive access for this work agent.
Audit every action and deny write or delete actions.
Review the draft before saving. For a safe first policy, allow only read access to a specific Drive folder, audit all actions, and require approval or denial for writes.
8. Assign The Policy
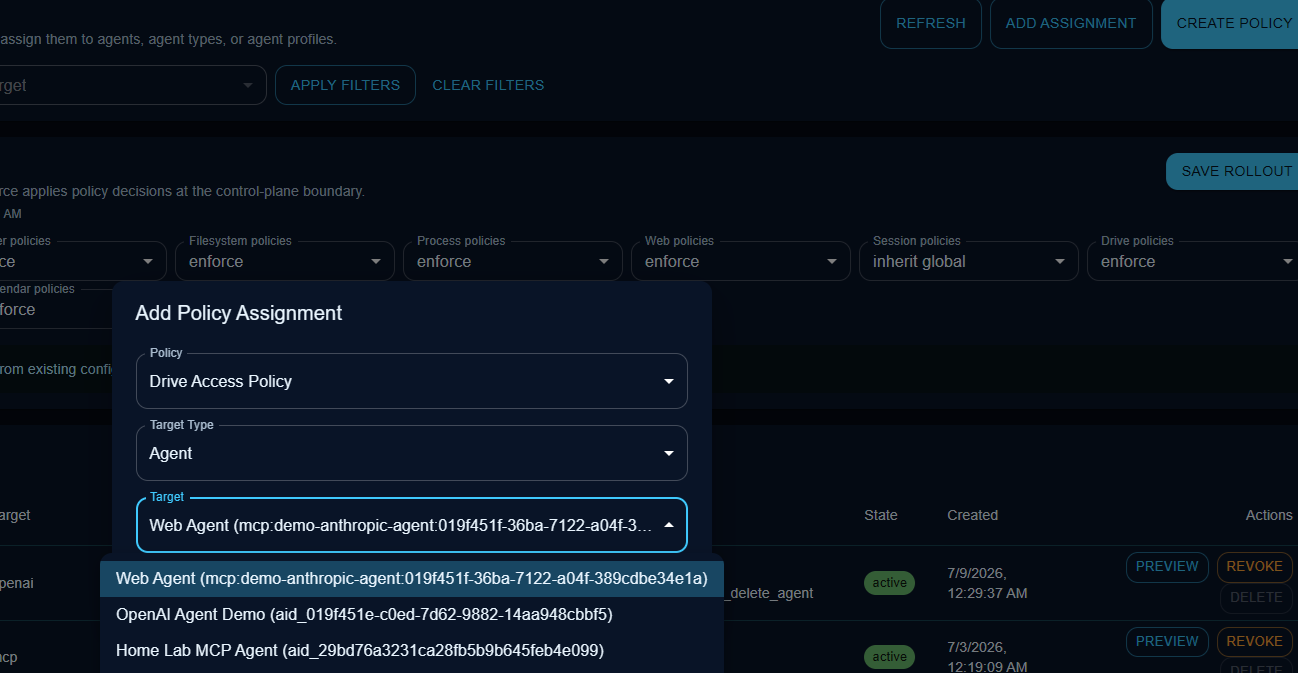
After the policy is created, assign it to an agent target.
- Assign to an agent type when every agent with that profile should inherit the same baseline.
- Assign to a specific agent when you want tighter control for one agent instance.
If the agent does not exist yet, create the agent first, then return to the policy assignment.
9. Create The Agent
Decide whether the agent is a container hosted agent or an MCP agent.
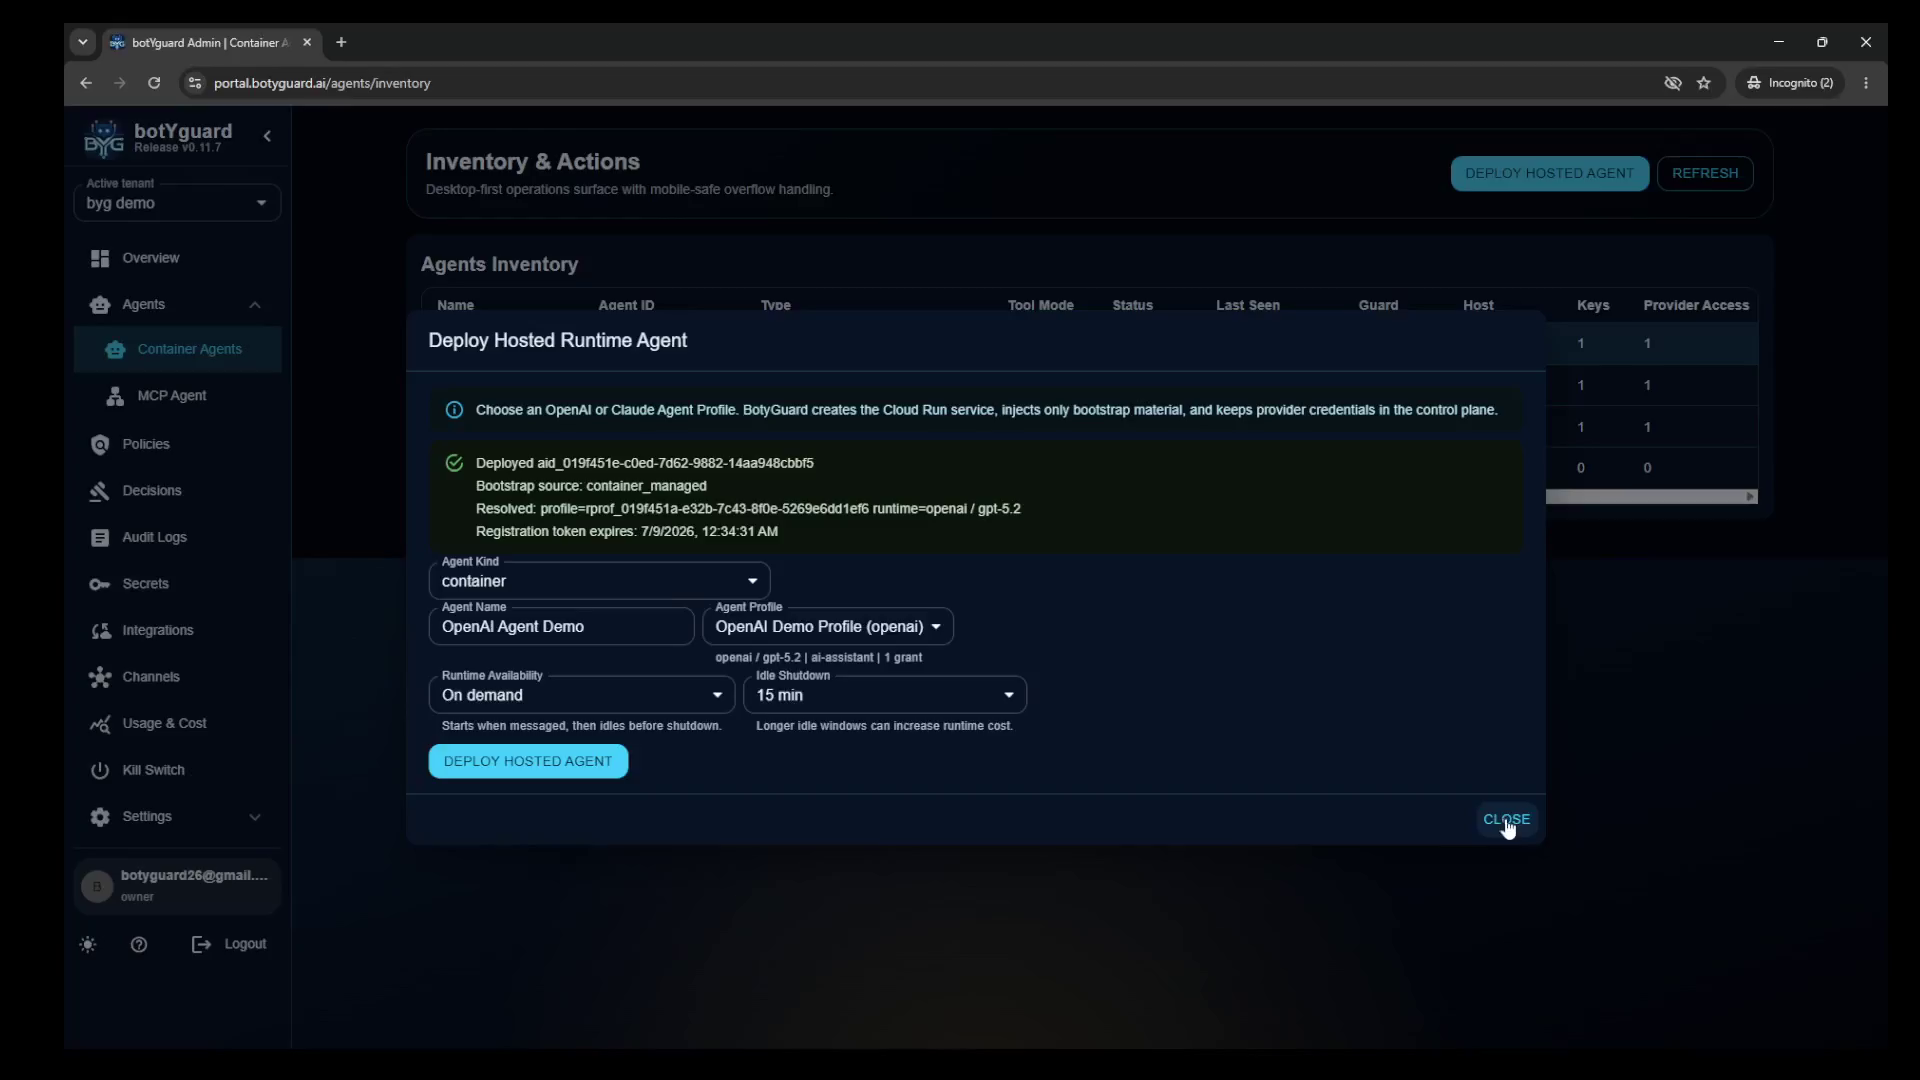
Container Or Hosted Agent
Choose this when you want botYguard’s custom agent deployed for the user’s specific use case. Select the botY profile, provider credential, and any required secrets for that agent.
MCP Agent
Choose this when an existing external agent needs to connect through botYguard.
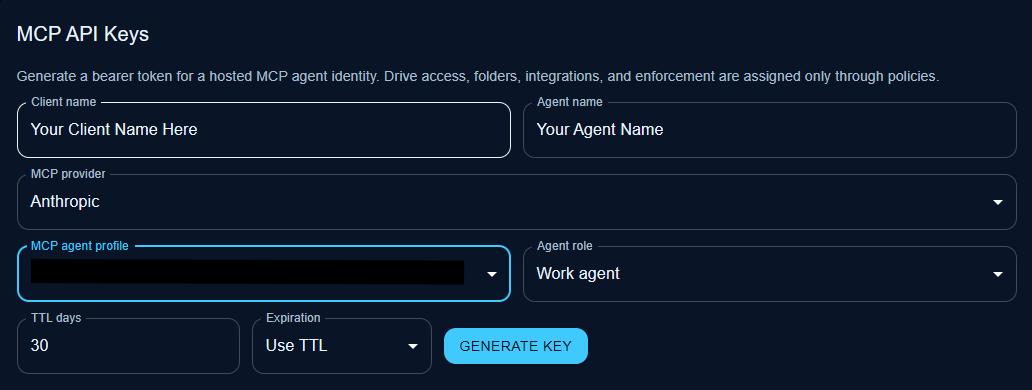
- Generate an MCP API key when the client can send a bearer token.
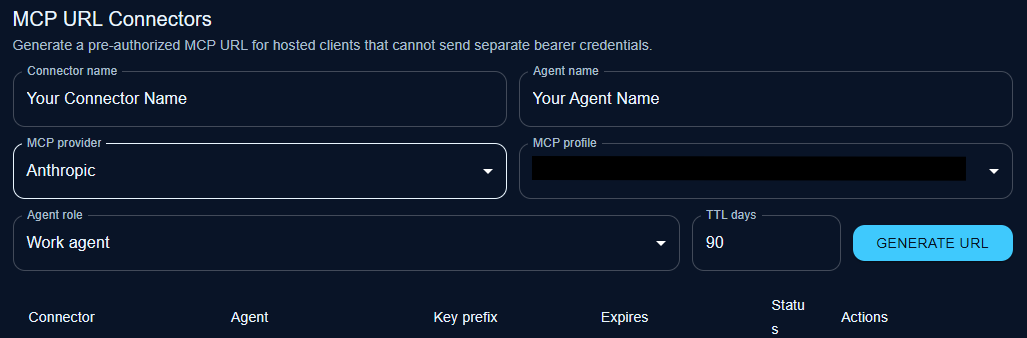
- Generate an MCP URL connector when the client needs a pre-authorized URL.
- Choose the MCP provider, botY profile, role, and expiration.
- Copy the credential immediately if the dashboard shows it once.
- Add the MCP URL or key to the external agent.
Do not paste provider secrets, Google refresh tokens, Discord tokens, or botYguard admin credentials into external agent instructions.
10. Validate The Setup
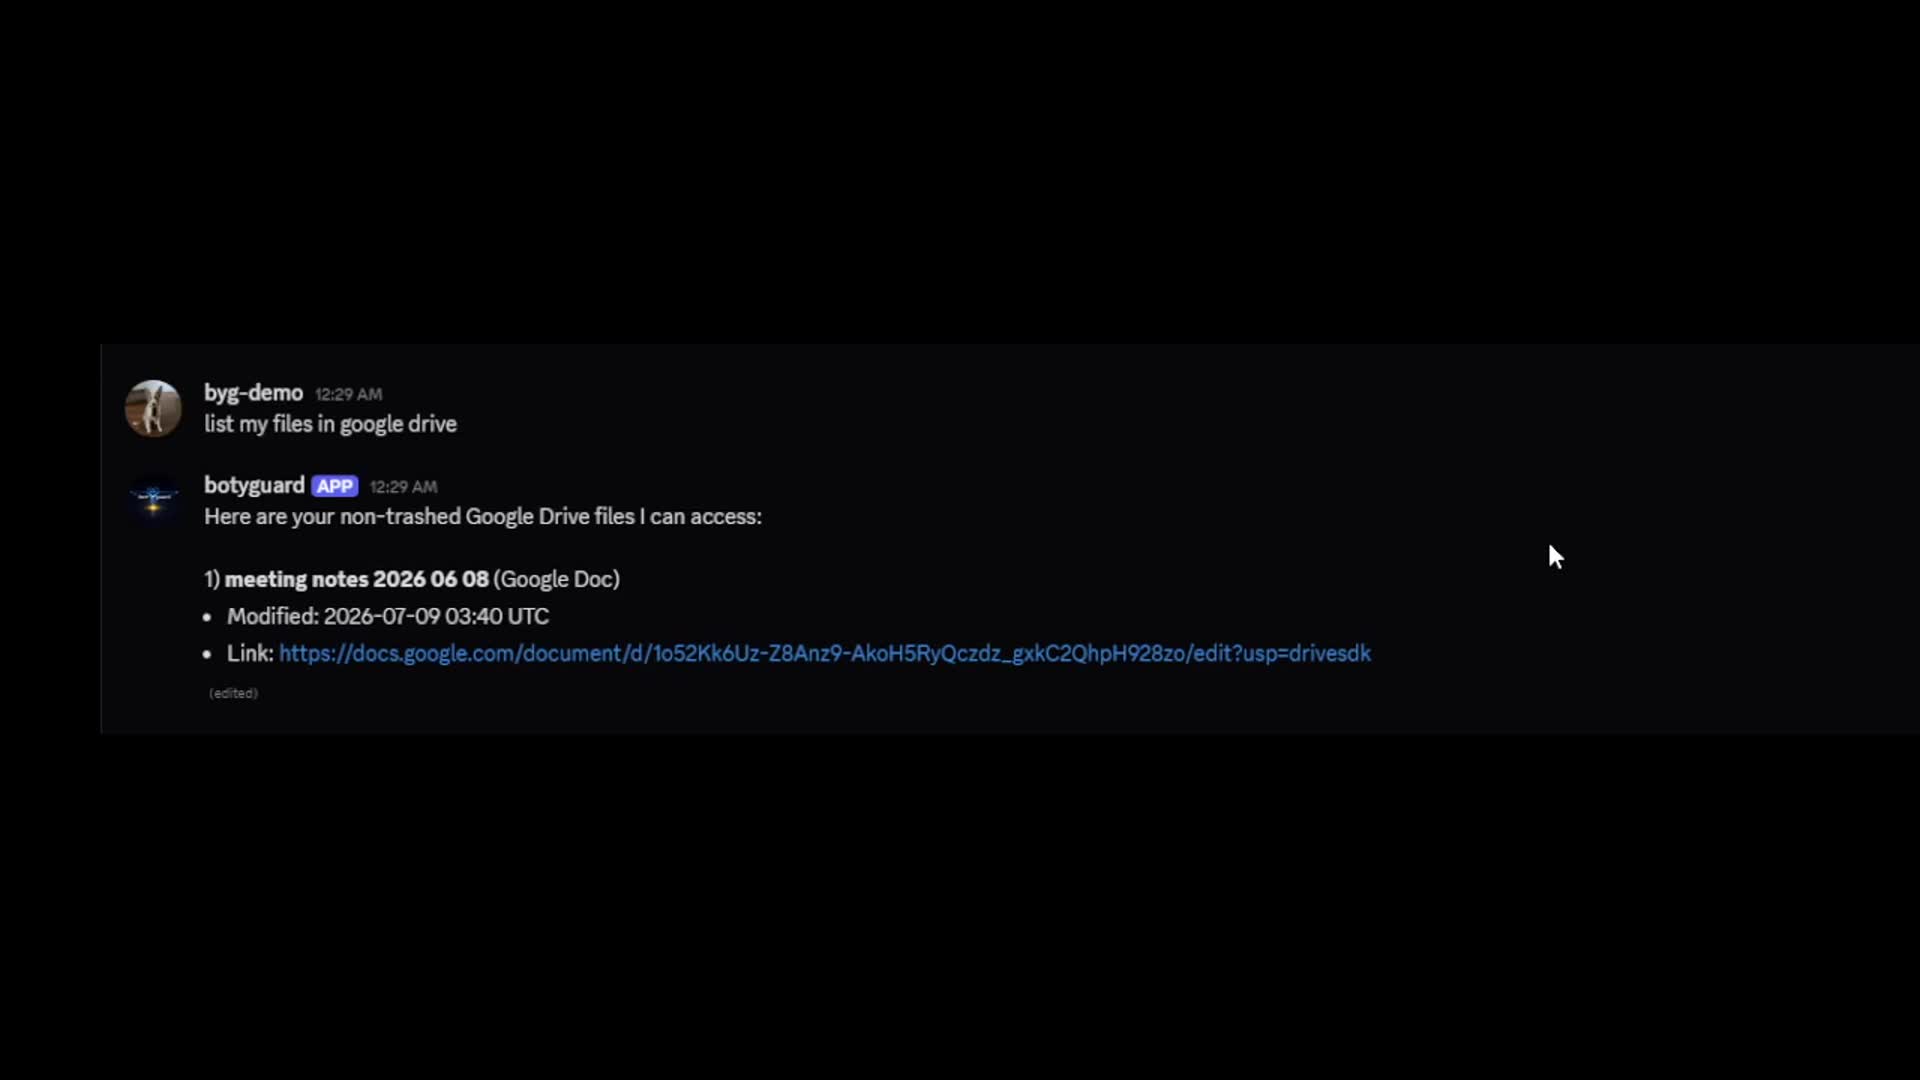
Run one simple request, such as asking the agent to list or summarize files in the allowed Google Drive scope. Then check:
- The Discord integration is active if you use approvals or redaction commands.
- The Google Workspace connection is active.
- The agent or agent type has the policy assignment.
- The policy decision matches the expected allow, deny, audit, or approval behavior.
- Configured redaction terms are hidden from the agent and rehydrated in chat where appropriate.
For ongoing questions, see the FAQ.